Simple Homemade Granola {with an extra nutritional kick}
This simple granola is a nutritious and delicious way to start your morning off on the right foot. You’ll never go back to store-bought!

Over the holidays we had a cookie exchange with a group of friends and one of the participants wanted to bring a non-cookie item to the exchange. Well of course I gave her a hard time for not bringing cookies (kidding of course), but what she brought was a fantastic recipe for granola. Sorry Rachel, I’m going to call you out. It was my good friend Rachel from Rachel Cooks. But I am so glad she decided to veto the cookies because the granola she brought was amazing!
Of course I asked for the recipe, and her reply was something like “It’s similar to a granola recipe on my blog, but I added a little of this and a little of that.” Well after eating all of the granola myself, I have been craving it like crazy and thought with how expensive, and sometimes unhealthy granola can be, why the heck am I not making my own granola?!

Well, I tried making this granola THREE times before I got it right. Hopefully you agree! You’d think basic granola would be easy to make, which it would be if you knew how your oven would react to cooking granola and didn’t burn it twice before learning to take it out of the oven sooner! And this is besides the fact that I shouldn’t be cooking anything when I’m sleep deprived – it’s almost a lost cause.
When it comes to granola I couldn’t help but reminisce about my time in Spain when I ate granola EVERY.SINGLE.MORNING. Actually in Spain I ate muesli, which is similar to granola but not the same thing. Granola is cooked with some sort of oil or butter and sweetener, where as muesli is eaten raw with no added fat or sweetener. Both can contain a variety of other ingredients such as grains, nuts, seeds, dried or fresh fruit and seasonings.
Spain is also where I started my obsession of cereal + yogurt. Since that time, I have never eaten any kind of cereal or granola with milk. Try it with yogurt sometime (vanilla is my favorite flavor), I promise it’s delicious!
Nutritional Tidbit
Not only are you getting a serving of healthy fats (mono- and poly-unsaturated fats) from the almonds and canola oil, but the ground flaxseed also provides an extra nutritional kick with omega-3 fatty acids and fiber! The healthy fats help lower bad (LDL) cholesterol, lower your risk of heart disease and stroke and may lower your risk of cancer. Purchasing ground flaxseed is best, since whole flaxseed likely passes through the intestinal tract undigested, so your body is unable to get all the nutritional benefits from them.
In addition to the healthy fat benefits, you’re also eating whole grains (oats). Whole grains help lower cholesterol and reduce your risk of obesity, type 2 diabetes and heart disease.

Simple Homemade Granola {with an extra nutritional kick}
9 servings (3/4 cup)
INGREDIENTS
3 cups old fashioned oats
¼ cup brown sugar
1 cup chopped almonds
¼ cup flaxseed, ground (optional)
1 tablespoon cinnamon
¼ teaspoon salt
½ cup raisins
4 tablespoons canola oil
4 tablespoons honey
1 teaspoon vanilla extract
DIRECTIONS
- Preheat oven to 300 degrees Fahrenheit. Line a cookie sheet with parchment paper or spray it with non-stick cooking spray (a rimmed baking sheet works best).
- Combine oats, brown sugar, raisins, almonds, flaxseed and salt in large bowl. Stir until combined (you can add raisins after baking if you’d prefer).
- In a microwave-safe bowl add canola oil, honey and vanilla. Heat in microwave for about 45 seconds at 40 percent power. Pour mixture over dry ingredients. Stir until all dry ingredients are coated with the liquid ingredients.
- Cook for 15 minutes, stir, then cook for another 10-15 minutes or until oats are light-brown in color. Don’t overcook!
- This granola can be stored for up to a week in an air-tight container (if it lasts that long!).
NUTRITION INFORMATION (includes flaxseed)
Serving Size: about ¾ cup
254 Calories, 9 g Fat, 1 g Saturated Fat, 41 g Total Carbohydrates, 4 g Fiber, 4 g Protein
© 2015 Kristy Hegner Disclaimer
This Simple Homemade Granola {with an extra nutritional kick} recipe was first published on Chocolate Slopes.
Healthy Snacks for Preschoolers {That They Will Actually Eat}

As a mom of two preschoolers I am constantly on the lookout for healthy snack ideas for my kids. But I’m also realistic enough to know that this age can be a bit choosy at times. I compiled a list of tried and true snack ideas that preschoolers will actually eat and enjoy.
As a dietitian, does this mean that these are the only snacks my kids ever eat? No. My kids also eat graham crackers, veggies straws, pretzels, etc. And yes, even a cookie now and then. Everything in moderation!
Today I’m guest posting for my friend Katie at Mom to Mom Nutrition who recently had a baby! I was thrilled when Katie approached me and asked me to help her out while she cares for her newest arrival. I was lucky enough to meet her in person recently since we happen to live only about 20 minutes from one another and I have to say, she is just as sweet in person as she sounds in her blog.
Head on over to Mom to Mom Nutrition to see the list of healthy preschool snacks along with these delicious No-Bake Peanut Butter Oatmeal Bites.

And trust me, these no-bake peanut butter oatmeal bites can be enjoyed by preschoolers and adults alike! Enjoy!
Simple Peanut Butter and Chocolate Croissants
These croissants are basically heaven wrapped in a pastry. Baked to a golden flaky crust and stuffed with peanut butter chocolate spread. What more could you ask for?

At first, I wanted to name my blog ‘Peanut Butter & Chocolate’ mainly because of my LOVE of peanut butter and chocolate. But being a dietitian who is trying to promote healthy living, I reconsidered. I also considered my attorney-husband’s advice that Chocolate Slopes is a stronger trademark than ‘Peanut Butter & Chocolate,’ in light of the services I provide on my blog.
Anyway, I am what you would call a late bloomer when it comes to Pinterest. I have no idea why, because boy was I missing A LOT. So I am now slowly building my Pinterest page with pins and more pins! A few weeks ago I was browsing my Sweets Board and came across these ridiculously delicious-looking croissants from Gimmie Some Oven and I thought, I want them NOW. They also reminded me of the pastry desserts sold all over Europe that I consumed (way too often) when I studied abroad in college. They were TO DIE FOR!
Well I just happened to have frozen pastry sheets in the freezer (I have no idea what I originally bought them for) AND I had almost a full jar of the Reese’s Peanut Butter Chocolate Spread™ thanks to my good friend Rachel from Rachel Cooks (because she is well aware of my obsession with anything chocolate and peanut butter). So I thought, why not make some peanut butter and chocolate croissants!
Once the pastry sheets are thawed enough to be unrolled, spread them out on a flour-covered surface. I found my countertop worked best because it’s a much larger surface area than a cutting board.

Slightly separate the rectangles using a spatula. Then using a plastic pizza slicer cut each rectangle at a diagonal to form two triangles.

Add a few tablespoons of the Reese’s Peanut Butter Chocolate Spread™ to each triangle. Then roll each triangle up into a pastry shape and place on a cookie sheet lined with parchment paper (or a silicone baking liner like I prefer).

Well let me tell you, this combination is FANTASTIC! You can eat them right out of the oven, or wait until they have cooled, either way they are simply delicious!

Simple Peanut Butter & Chocolate Croissants
INGREDIENTS
¾ of a jar (about 1 cup) Reese’s Peanut Butter Chocolate Spread™
Pastry sheets, 2 sheets
1 egg
1 tablespoon water
DIRECTIONS
- Thaw the pastry sheets for about 15 minutes or until you can unroll the sheets without them sticking together.
- On a lightly flour-covered surface, spread out the pastry sheets. Using a rolling pin, slightly roll the pastry sheets until they are smooth. Separate the rectangles slightly and cut at a diagonal to form two long triangles from each rectangle.
- Add about 2 tablespoons of the Reese’s Peanut Butter Chocolate Spread™ to the larger side of each triangle and roll them toward the narrow side of the triangle.
- Place each rolled triangle onto a cookie sheet lined with parchment paper.
- Whisk together one egg and one tablespoon of water. Brush egg over each rolled pastry.
- Bake for 20-25 minutes at 350 degrees Fahrenheit or until the pastries are a light golden color.
- Enjoy warm or at room temperature. Refrigerate remaining croissants (if there are any left!) and consume within 3 days.
Adapted from Gimme Some Oven
*I was not compensated in any way by The Hershey Company™ for this post. I just happen to love anything peanut butter & chocolate, and Reese’s makes one of the best combinations of my two favorites!
Interested in household tips, recipes, activities for kids and more? Check out How to Get Organized at Home.
This recipe Simple Peanut Butter & Chocolate Croissants was originally published on Chocolate Slopes.
© 2015 Kristy Hegner Disclaimer
Kale and Feta Salad {with Homemade Honey Vinegar Dressing}

Over the holidays I was part of a Facebook group created to motivate and encourage one another to get through the holidays while still eating healthy (enough) and making time for exercise. Of course, this is easier said than done during the holiday season, but with a little added support, it sure helped me!
One of the members of the group posted a gorgeous picture of a delicious looking salad, and I thought I need to make this ASAP. I love to eat salad, and love to cook in general, but for some reason I don’t enjoy making salads. I also have NEVER made homemade dressing but it was something I have wanted to start doing because I consistently throw out store-bought dressings (we can’t seem to use them before they expire). Also, homemade dressings are inevitably healthier since you know exactly what ingredients they contain.
Well I can’t tell you how glad I am to have discovered this recipe. I particularly love the fact that kale is tougher than other leafy greens so you can prep the salad ahead of time, including the salad dressing, and it stays crisp for a few days!
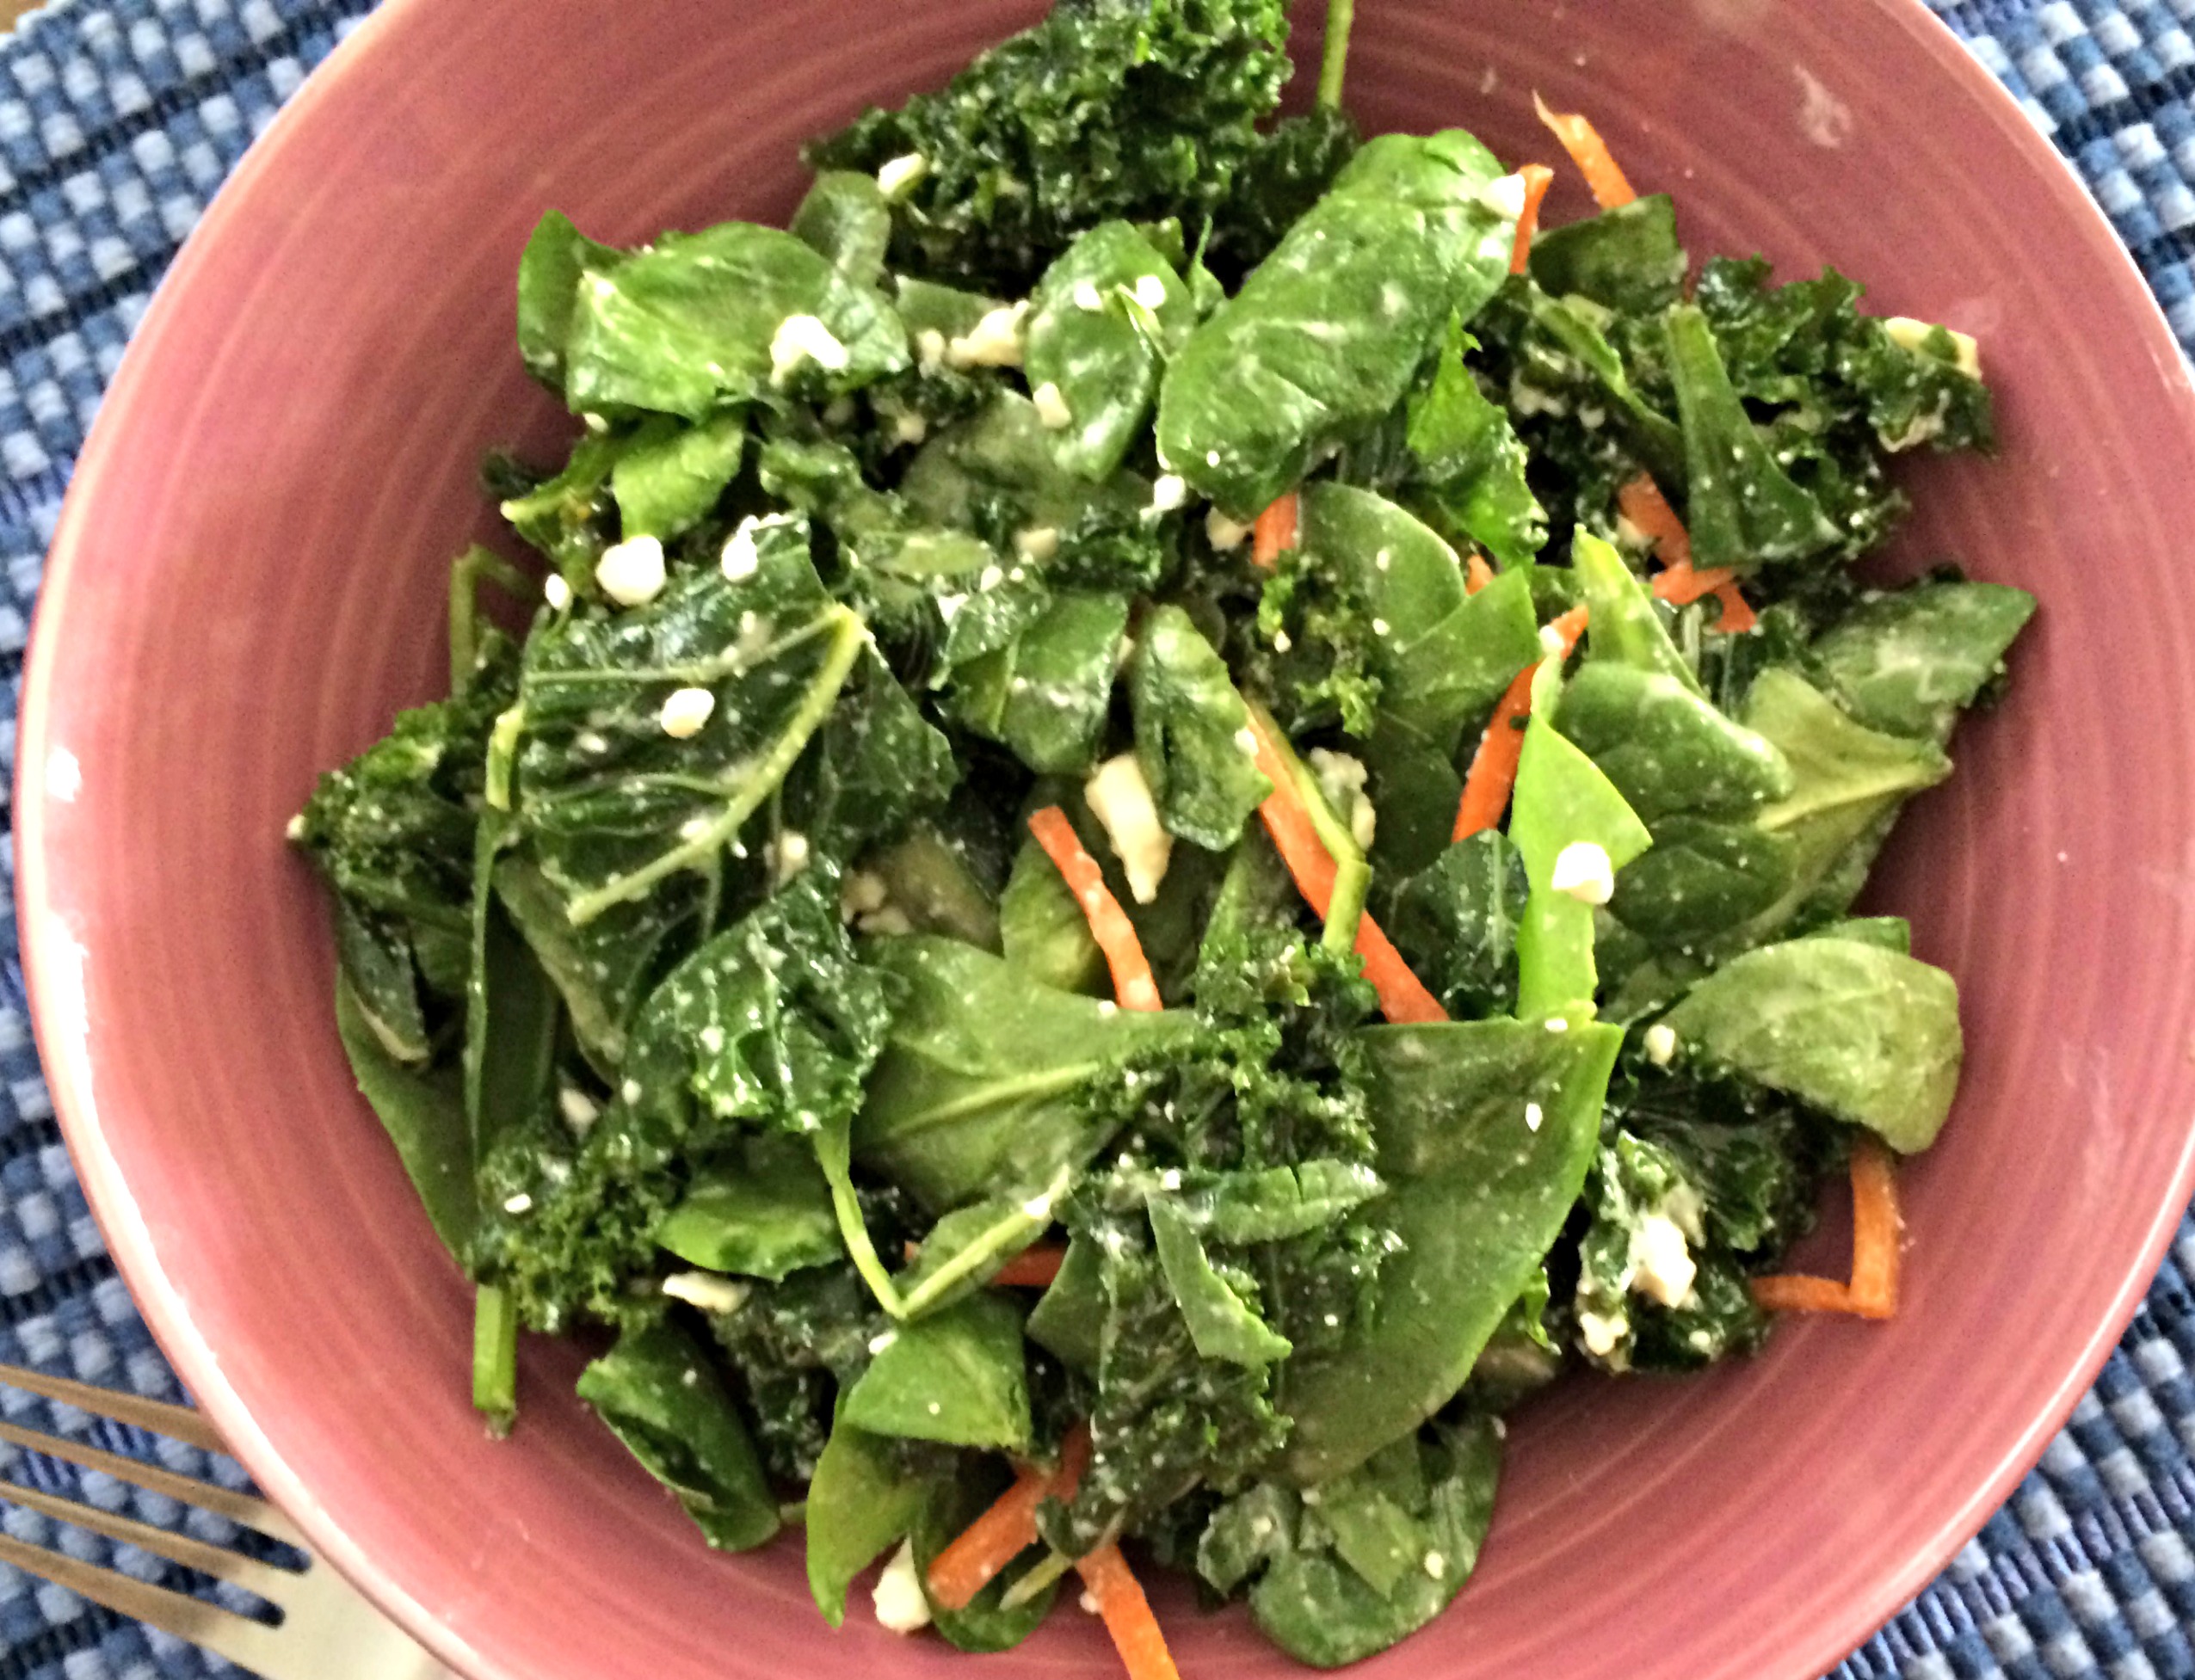
I have made this salad several different ways already, and this time I had spinach left over from another recipe so I thought I would add that as well. Just keep in mind if you do make it ahead of time, add the spinach right before you plan to eat the salad to prevent the spinach from wilting too much. Also, I buy reduced-fat cheese almost 100 percent of the time but for some reason I had regular feta cheese in the fridge so I used that instead of reduced fat cheese.
This healthy salad includes nutrients such as fiber, and vitamins A, C, E, and K. While it’s a fantastic addition to any meal, I paired it with this Barley and Bulgar and Vegetable Vegan Casserole from Rachel Cooks for an even healthier combination.

Kale and Feta Salad {with Homemade Honey Vinegar Dressing}
Serves 4
INGREDIENTS
1 bunch kale, stemmed and chopped (about 4 cups)
2 cups baby spinach
½ cucumber, sliced
½ cup crumbled feta cheese
½ cup shredded carrots
3 tablespoons apple cider vinegar
1 tablespoon honey
1 teaspoon Dijon mustard
¼ cup olive oil
salt and black pepper to taste
DIRECTIONS
- Add kale to a large bowl.
- Whisk vinegar, honey, and mustard together in a small bowl. Continue whisking while slowly adding olive oil, salt and pepper.
- Pour dressing over kale and toss with tongs until kale appears soft.
- Add spinach, carrots, cucumber and cheese to kale.
- Cover with plastic wrap for about 1 hour in refrigerator before serving.
Adapted from The Food Network
NUTRITION INFORMATION (1 serving)
237 Calories, 18 g Fat, 5 g Saturated Fat, 15 g Total Carbohydrates, 2 g Fiber, 6 g Protein
This Kale and Feta Salad recipe first appeared on Chocolate Slopes.
© 2015 Kristy Hegner Disclaimer
Quick and Healthy Snacks for the Busy Professional

Do you have a busy and demanding job that doesn’t allow much time for snack preparation? Well look no further. I have collected several snack ideas that are not only healthy options, but also require little to no preparation.
My husband has a desk job working a ton of hours so of course he doesn’t want to spend time preparing snacks before going to work. Oh wait, I forgot he has me, his loveable, extremely helpful cook and baker wife who just happens to be a dietitian who cares about his health. With that said, I also don’t have a ton of extra free time to prepare extravagant snacks for him or myself. So we often rely on these ready-to-eat snacks that require little effort to prep. I have also included a few products to give specific examples of the snacks (of course, this list is not all-inclusive).
Hummus and vegetables or pretzels
Product ideas: SabraTM Hummus with Pretzels (single serving): these convenient packages are perfect for being on-the-go, or a great snack to keep in your office desk. With 260 calories, 19 grams of fat (but only 3 grams saturated), and 7 grams of fiber, this product is a great go-to snack that will leave you satisfied. SabraTM also sells individual 2 oz hummus containers which are a great to eat with carrots or red peppers.


Nuts
A great source of healthy fats (mono- and poly-unsaturated fats) and protein.
Product ideas: PlantersTM NUT•rition Mixes have great mixes in convenient packages.

Peanut Butter
Two tablespoons of peanut butter provide about 190 calories and 16 grams of fat (only 3 saturated), and is a great source of protein with 8 grams per serving. It’s a great shelf-stable protein source that’s easy to keep at your desk. Dip celery, peppers, or pretzels in the peanut butter for a delicious and nutritious snack.
Fruit
Fruit is full of fiber, along with several essential vitamins and minerals. Some types of fruit require zero prep time, like bananas, others require only rinsing, like apples and pears. Most grocery stores also have pre-chopped fresh fruit in individual sized containers to grab and go (albeit more expensive but a great grab-and-go snack if you’re pushed for time). And don’t forget dried fruit (raisins, craisins); just be aware dried fruit is much more calorically dense than fresh fruit. A small box of raisins is about 130 calories (about ¼ cup) compared to a cup of grapes is about 62 calories. In terms of satiety, eat the dried fruit and drink an extra glass of water!

Vegetables
Package fresh veggies in zip-lock bags to grab on the go, or buy these convenient packs with dip already included. Just like fruit, you’ll find plenty of fiber, vitamins and minerals in vegetables. Fiber not only helps your digestive tract, but also helps keep you fuller longer.
Snack Bars
There are a ridiculous number of snacks bars (granola bars, breakfast bars, etc) that you’ll find at the grocery store. The main components I recommend you look for in a snack bar are the calories and fiber content. I personally focus on the fiber content which helps keep me fuller longer, while keeping the calories in check as well. For a basic granola/breakfast bar a good guide is to look for bars with less than 15 grams of sugar, and at least 4 grams of fiber. Now I’ll also keep calories below 200 since it’s used as a snack and NOT a meal replacement.
Granola/Breakfast Bar Product Ideas: BelvitaTM Soft Baked Breakfast Bar, KashiTM Chewy Granola Bars Trail Mix

Protein Bars
Protein bars are quite popular for athletes, but can also be beneficial for the average person. However, I do not suggest eating them to replace meals on a regular basis. On days that you’re rushing from meeting to meeting or forgot your lunch, grabbing a protein bar is a good choice. This can help prevent overeating at the next meal or eating a candy bar from the vending machine. For a basic protein bar a good guide is to look for bars with at least 10 grams of protein, less than 15 grams of sugar and less than 350 calories for a meal replacement or less than 200 calorie as a snack. One of my husband’s favorites is the Supreme ProteinTM bar, particularly when he’s craving chocolate!
Whole Grain Cereal
Throw some whole grain cereal in a plastic container or zip-lock bag and bring it to work. Stick with cereals with whole grain (whole wheat, whole corn, etc.) as the first ingredient, less than 10 grams of sugar and at least 3 grams of fiber.
Product Ideas: QuakerTM Oatmeal Squares (my family’s favorite), KashiTM GOLEANTM or Honey Nut CheeriosTM
Cheese and Crackers
String cheese is a great protein source and part-skim options have only between 50-70 calories and 4-5 grams of fat. Eat them with some whole grain crackers and you have a great snack option.
Whole Grain Product Suggestion: KashiTM Crackers Original 7 grain

With just a little thought involved you can make improvements to your overall diet by including some of these healthier snack options. Hope this helps you make healthier choices when you’re pressed for time!
What are your favorite quick and healthy go-to snacks?
Chicken, Vegetable and Barley Stew {Crock Pot}

This healthy and delicious stew is perfect for any winter day and is great paired with warm whole wheat dinner rolls!
I have viewed this recipe on Pinterest for quite awhile and have been dying to try it. Well, what’s a better time to cook it than when it’s 2 degrees out with wind chills making the temps feel like it’s 20 below!? I adapted the original recipe just a bit from Iowa Girl Eats, which just by reading her subtitle of “Eat Well, Run Often, Travel Far” I know I already like her. I have never met Kristin or spoke with her but each one of those themes could describe my life, except maybe the “travel far” theme. I LOVE to travel, but these days it’s not quite as feasible with a 4 year old, 2 year old and 1 year old. Someday we will do some real traveling again…
Anyway, back to the recipe. I love that it includes a ton of vegetables including kale. I have been on a bit of a kale kick lately. It’s a hardier green leafy vegetable compared to most, it doesn’t wilt quickly when marinated in salad dressing and is a great addition to soups and stews. Yes, I know I’m about a year behind the kale craze and I’m ok with that.
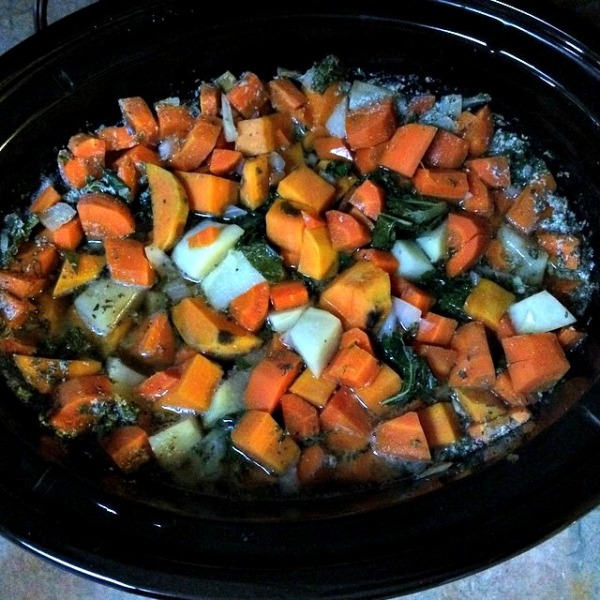
Something to note: when I chopped the potatoes and carrots, I did not chop them small enough so they were not as tender as I would have liked after 5 hours (as you may notice above) so I cooked it for about 6 hours. Keep that in mind when chopping the vegetables and adjust the cooking time accordingly. Also, my husband’s suggestion was to add more salt for a little added flavor. So you could stick with the 1 ½ teaspoons like the original recipe states, I personally prefer to reduce the sodium content in recipes whenever possible.
Nutritional Tidbit
Barley along with the vegetables in this recipe is loaded with fiber which can help lower your cholesterol and keep you fuller longer.
And as I’ve mentioned in a previous post, prepping vegetables the day you purchase them can save you time when you are in a rush to get dinner ready.

Chicken, Vegetable & Barley Stew {Crock Pot}
Closely adapted from Iowa Girl Eats
Serves 8
INGREDIENTS
48oz chicken broth, low sodium
14 oz chicken breast (I used 7 – 2 oz chicken tenders)
¾ cup regular barley (not quick-cooking)
1 bunch of kale (about 5 cups)
1 large onion, chopped
1 large sweet potato, peeled and chopped
1 regular potato, peeled and chopped
3 carrots, peeled and chopped
2 garlic cloves, minced
2 teaspoons Italian seasoning
½ teaspoon salt
½ teaspoon black pepper
¼ teaspoon white pepper
2 bay leaves
DIRECTIONS
- Add chicken broth, garlic, Italian seasoning, salt, black pepper, white pepper and bay leaves to crock pot. Stir to combine.
- Next place the chicken, barley, kale, carrots, onion and potatoes in crock pot without stirring. Make sure everything is covered with the chicken broth. Press down on the vegetables if needed.
- Cook on low for 5 – 6 hours or until barley and vegetables are tender.
- Remove bay leaves and chicken. Shred chicken using two forks and return chicken to the crock pot. Stir until combined.
*This appetizing stew pairs well with whole wheat dinner rolls or crackers
NUTRITION INFORMATION (1 serving)
285 Calories, 8 g Fat, 2 g Saturated Fat, 40 g Total Carbohydrates, 6 g Fiber, 14 g Protein
You may also enjoy:
20 Minute Turkey, Bean and Spinach Soup by Rachel Cooks
This Chicken, Vegetable and Barley Stew {Crock Pot} recipe first appeared on Chocolate Slopes.
© 2015 Kristy Hegner Disclaimer
Hearty Beef Chili

Who doesn’t love a delicious beef chili on a frigid January evening? Ideally I’d love to be eating this chili in my great room, next to a wood-burning fireplace overlooking mountains. But I forgot, I live in Michigan, and don’t even have a fireplace (a girl can dream, right?). If you live in the northern half of this country like my family, we have plenty of opportunities to enjoy warm, savory meals like this one with our sometimes never-ending winters. I shouldn’t complain though, at least December was rather mild until we entered January with temps in the teen’s!
This chili is quite simple to make which I love because anything that takes longer than 20 minutes to prep is asking to be burned with 3 young children all at home while I’m cooking. Don’t be intimidated by the amount of ingredients, its mostly spices which you can set out at one time and chop the vegetables ahead of time to speed things up.
Time Saver Tip
On the same day that I shop at the vegetable and fruit market, I chop at least one large onion and one green or red pepper. Then I store them in a Rubbermaid container in the refrigerator until I’m ready to use them in a recipe. Now you may not use onions and peppers are often as I do (almost every recipe) but you likely have a few favorite vegetables that need prepping. Try cutting them up ahead of time to help save you time when you are in a rush to get dinner on the table.
To see a comparison of the various ground beef and ground turkey options, check out the Calories, fat, and saturated fat for each type of ground beef chart I made for a previous post. It’s enlightening!

To begin, heat olive oil over medium-high in a large skillet. Add the chopped onion and green pepper and sauté until tender. Add the ground beef until thoroughly cooked.
While the meat is browning, begin adding the beans, tomatoes, tomato sauce and green chilies to a large stock pot (use at least an 8 quart pot). Next add the seasonings to the pot along with the beef and vegetable mixture once the meat is cooked.

Cook on low heat for about an hour, stirring occasionally. I typically need to stir my chili about every 10 minutes since my gas stove does not have the best “low” setting. I like to cook the chili for about 1 hour uncovered, or until some of the liquid from the stewed tomatoes has evaporated. You may not be able to tell by the pictures but I love my chili extra thick!
If you like an extra spicy kick, add the optional chipotle chili powder. I prefer my meals on the less spicy side so I tend to avoid using the extra seasoning.
Also, don’t forget to remove the bay leaves when you’re doing cooking the chili. I tend to forget to take them out and my husband is the one who typically discovers the surprise I left for him in the chili. Oops!

Beef Chili
Makes about 13 cups
INGREDIENTS
1 lb extra lean ground beef (95% lean) or lean ground turkey (93% lean)
3 cans (16 oz) dark red kidney beans, low sodium
2 large cans (28 oz) + 1 can (14 oz) stewed tomatoes
1 small can (8 oz) tomato sauce
1 small can (4.5 oz) green chilies, sliced/chopped
1 medium onion, chopped
1 green pepper, chopped
1 tablespoon olive oil
3 tablespoons chili powder
1 tablespoon basil
1 tablespoon parsley flakes
2 bay leaves
1 teaspoon black pepper
1 teaspoon chipotle chili powder (optional)
DIRECTIONS
- Heat olive oil over medium-high in a large skillet. Add chopped onion and green pepper and sauté until tender.
- Add the ground beef and heat over medium-low heat until thoroughly cooked.
- While the meat is browning, add the beans, tomatoes, tomato sauce, green chilies and seasoning to a large stock pot (use at least an 8 quart stock pot).
- Add the beef, onion and pepper mixture to the stock pot and cook on low heat for about an hour, stirring occasionally.
Optional: serve with shredded cheese and sour cream
NUTRITION INFORMATION
Serving Size: approx. 2 cups
400 Calories, 6 g Fat, 2 g Saturated Fat, 62 g Total Carbohydrates, 17 g Fiber, 32 g Protein
© 2014 Kristy Hegner Disclaimer
New Year’s Resolutions {Diet and Fitness}: Let’s Be Realistic

(Image from buzzfeed.com)
Is anyone sick of reading or hearing about New Year’s resolutions? Or the pressure to make a great list of goals that you will achieve for 2015? If you Google “New Year’s Resolutions” you’ll find plenty of top 10 resolution lists to peruse with numerously suggested goals. Don’t get me wrong, I love setting goals and achieving them, but only YOU can set your goals, and only YOU can achieve them. So personally, I make my own goals reachable AND desirable to me.
If you have never run a mile in your life AND despise running, I would suggest not setting a goal to run a marathon in 2015. My point is set goals that you WANT to achieve . . . and that are attainable.
When I was at the gym a few days ago, two sisters were talking about how one of them could not stand to be at the gym (sister #1 was a regular at the gym and convinced sister #2 to join her). They had been going to the gym for the last 6 months but sister #2 said she “despised working out, it was exhausting, but [she admitted] I know it’s good for me.” I couldn’t help but join the conversation and asked her if she saw an improvement now compared to before she started working out (e.g. losing weight, more energy, sleeping better). And she said “yes,” she had stopped taking sleeping pills and was sleeping much better naturally. Well, I have to say, she was quite pleased with that realization. But even though she saw some positive ‘spin’ on working out, I couldn’t help but think how long will she continue doing something she despises, regardless of whether she sees some results? I was quite impressed she made it 6 months but to make it a lifestyle change, It’s likely she’d need to find something she enjoys doing.
If you want to get in better shape and start exercising regularly, why not find something you ENJOY doing, since it’s much more likely you’ll stick with it!
For several years I had a gym membership since I enjoyed how I felt after exercise and loved that it helped keep my weight in check, but I never really enjoyed using any of the cardio machines. They were monotonous and boring to use. Once I discovered running I began to have a purpose for going to the gym (at least in the dead of winter when I couldn’t run outside because the sidewalks were covered in a foot of snow). My goals of finishing a 5K, a 10K and eventually a half and full marathon were motivating me to continue going to the gym and using the treadmill since I ENJOYED running. These days, there are times that I don’t feel like running, but my goal simply is to do something for myself (now having children!), and having little time to myself helps me love running even more.

(Image from http://www.joyinourjourney.com)
Here are a few tips to get your year started off right!
Fitness Goals…
Fitness goals are one of the top resolutions people make. And this one is OBVIOUS when you go to the gym and you can’t find a parking spot anywhere for the entire month of January. Yup, for us regular gym goers, it’s a bit annoying, but my hope is at least a few of those January gym goers find something they enjoy at the gym and stick with it! Of course, you do not need a gym membership to stay fit. When my husband and I first met, we were line dancing 3 to 4 times a week for several hours at a time. Talk about a great workout!
- Maybe you enjoy walking, biking or Zumba classes
- Prefer to work out in the privacy of your own home? Try workout videos (You Tube has thousands to choose from)
- Enjoy sports? Join a YMCA or recreational league
Bottom line . . . find an activity you enjoy and schedule it into your day.
Diet Goals…
Next to fitness goals, losing weight is one of the top resolutions we make. I think it’s great that people want to lose weight and be healthier, but I suggest making changes that are realistic to your lifestyle. If you detest salads, don’t force yourself to eat salads just because they are healthy for you. It will not last. Know thyself.
- If you need to see concrete data and calorie counting works for you, try an app like
- If you like more flexibility, consider adding one or two healthy foods to your diet instead of taking unhealthy foods away
- If you know that cookies or candy are too tempting to have in the house, then make a decision to avoid buying them, and tell your significant other to eat them out of sight if he/she still wants to eat them.
Bottom Line . . . find out what technique or strategy works best for you and stick with it!
Hopefully you can use some of my tips to help in your own life and achieve realistic goals/intentions/habits that you would like to develop over the next year.
What fitness or diet strategies work for you? I’d love to hear your ideas!
Happy New Year!
Creamy Ham Dip

Anyone still exhausted from last week and all the festivities? Well, I definitely am, and likely the most exhausted I’ve been for any holiday in years, but not surprising with 3 active young children. And I thought last year was exhausting with a 2 weeks old…ha! Don’t get me wrong, I LOVED Christmas with my kids this year, to see the excitement in their eyes during all the celebrations and on Christmas morning is not something I’ll ever forget. But it was still exhausting nonetheless.
This simple appetizer is the perfect idea to bring to just about any party, especially when you have 3 children under 5 and they are all going to the party and you need to get everyone ready for the party including yourself. It takes about 5 minutes to put together and you can make it ahead of time. My aunt would make this every Christmas and all the kids (and adults) knew that if we weren’t the first to arrive, it was likely the ham dip would be gone before we had a chance for a bite.
Start by softening an 8 oz package of cream cheese and chop up ham slices into small pieces.

Once the cream cheese is softened add minced onion, mayonnaise, mustard and half of the chopped ham. Mix until all the ingredients are combined. Form this into a ball and place on a serving plate.

Use the remaining ham to cover the outside of the cream cheese ball and refrigerate until ready to serve. Serve it with your favorite crackers. I prefer Wheat Thins or Kashi crackers.

Creamy Ham Dip
INGREDIENTS
7 slices of ham, chopped and divided
8 oz cream cheese, softened
1 tablespoon mayonnaise, light
1 teaspoon mustard
1 teaspoon minced onion
DIRECTIONS
- Combine half of the ham, cream cheese, mayonnaise, mustard and minced onion.
- Form mixture into a ball and place on a serving platter.
- Add remaining ham to outer layer of cream cheese mixture.
- Serve with your favorite crackers and refrigerate until ready to serve.
© 2014 Kristy Hegner Disclaimer
Simple Ambrosia Fruit Salad

Need a last minute dish to bring to Christmas dinner? Look no further, this fruit salad is a super simple healthy side dish. And the best part is you likely have the ingredients on hand!
I love Christmas dinner. About 99 percent of the time, our family has Honey Baked Ham, which to me is the best tasting ham around. And the funny thing is the other 364 days of the year I don’t choose to eat ham. It’s not that I dislike ham, I just prefer turkey over ham.
Anyway, back to the fruit salad. I was first introduced to this recipe when I met my husband and he raved about his mom’s fruit salad that she would make for the holidays when he was growing up. Well he asked her for the recipe and I’ve been making it quite often ever since.

Of course, the one thing my husband was expecting to eat on Thanksgiving (this fruit salad), was not on the menu. Sorry honey – I would have easily made it if I had remembered. But considering I hosted Thanksgiving this year, made the turkey, gravy, stuffing AND we got up at 5 am as a family to run the Turkey Trot downtown, I’m not surprised I forgot. So at least my husband will be getting his fruit salad for Christmas dinner. (Just a note – my husband was not that upset, he is gracious and thankful for whatever meal I make).
To begin, place a strainer over the top of a large bowl. Add canned mandarin oranges, fruit cocktail and pineapple chunks to the strainer and let it sit for about an hour to drain all the liquid.

Chop the walnuts and apple and slice a banana. Add the nuts and fresh fruit to the canned fruit and gently stir. Finally add the Cool Whip to the fruit mixture and stir only until combined. And that’s it. Pretty simple.
Simple Ambrosia Fruit Salad
INGREDIENTS
1 ½ cups of Cool Whip (whipped topping)
1 can mandarin oranges, in light syrup
1 can fruit cocktail, in light syrup
1 can pineapple chunks, in 100% pineapple juice
1 banana, sliced
1 apple, chopped
½ cup walnuts, chopped
DIRECTIONS
- Place a strainer over a large bowl and add mandarin oranges, fruit cocktail and pineapple chunks to the strainer. Let this sit until all the juice drains.
- Combine the canned fruit, banana, apple and walnuts in a large bowl.
- Add Cool Whip to the bowl, mixing only until combined.
- Refrigerate until ready to serve.
NUTRITION INFORMATION
Serves 8
196 Calories, 7 g Fat, 2 g Saturated Fat, 35 g Total Carbohydrates, 3 g Fiber, 2 g Protein
Need a few other healthy side dish options for Christmas dinner? Check these out…
Sautéed Green Beans with Almonds
Butternut Squash Mash with Smoked Paprika {Rachel Cooks}
Merry Christmas!
© 2014 Kristy Hegner Disclaimer

